


Laundry room is called as one of wet areas in a home after kitchen and bathroom. It’s different to select the tiles for wet area and ordinary rooms. Wet area tiles must be anti-slip, water resistant, durable, and strong. These criterion are so important to get optimal safety and long lasting tiling.
Discussing more about the laundry room tile, there are several numbers of recommended tiles to apply. One of them is porcelain tile. Before installing one by one porcelain tile in our laundry room, make sure that we have done the following steps. First, build the subfloor by covering the base of floors with cement board. This cement board then is intended as the surface or base of porcelain tile installation. Second, cut the porcelain tiles off based on your needs. It is up to you to make a decision about the size of cut-porcelain-cut. You can use knife or electric knife to cut them off in instant.
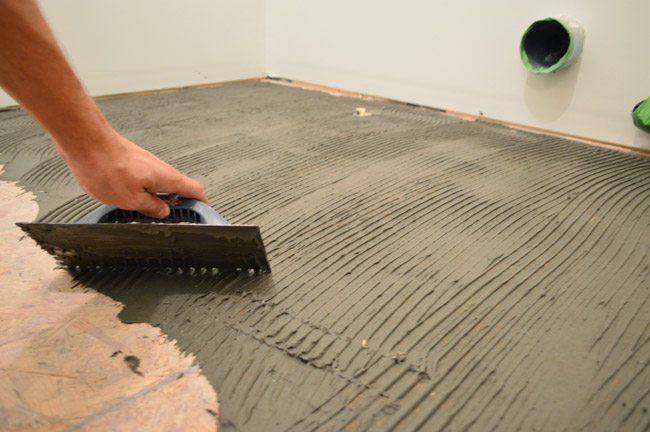
Third, cover the base floor with thinset. Thinset here is used as the second layer after the cement board. To keep every piece of thinset well-organized without shifting or flexing, make sure that the cement coat is still in wet. To make sure that the thinsets are in secure toward the floor, screw them down along the edges (by giving the interval of 6 to 10 inches) by using cement board screw. Screw down the middle area of thinset (for about every 12 to 16 inches).
Fourth, some tutorials suggest covering the seams and screwing holes by just applying the mesh tape on holes and seams. Fifth, we may start to fit the cut-off porcelain tiles over the thinset. Just figure out what pattern you are going to use . With these steps, we can do laundry room tile installation by ourselves. The steps are easy to understand and to practice, so what are you waiting for? Just prepare the materials and tools, then start to do the project of installing the laundry room tile.
Reference: www.hgtv.com