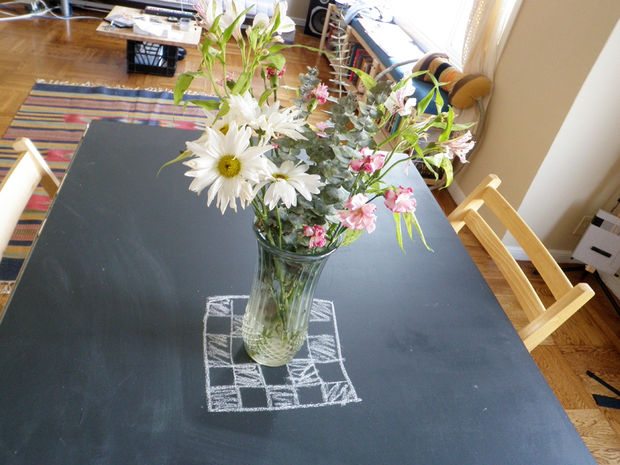


Have you ever experienced sketching out something on your table? Either using markers, pencils, or colored pencils, the craving to sketch or doodle on your table has ever crossed your mind probably once. Unfortunately, as strolling in the furniture store, there are only limited choices of table that can satisfy your cravings. In that case, why don’t you come up with the idea of constructing your own chalkboard table? This do-it-yourself can be helpful as it gives handy and unchallenging ways to create chalkboard table that will give you freedom to make any drawings or doodles in it without any effort to grab your notebook.
Materials that you need to have previous to starting off:
– Board (the size depends on your desired table-size)
– 2 pieces of wood bar 3′ sections of 1×2
– Wood glue
– A board as the weight
– Chalkboard paint
– 2 black trestlework
– Rollers, trays, paint brushes
– 2 pieces of 6′ aluminum extrusions
– A power drill and a set of 1/4 and 5/32 drill bits
– Screwdriver and wood screws
– Chalkboard chalk
Steps:
-Using the available set of materials, you can embark the assembling of the table’s feet for well-balanced foothold.
-As the trestlework for the table’s foot is ready, affix the wood bar in parallel lines to fill the length of each trestle’s distance.
-The next step is to set a board in the top of the trestle and let the glue to dry to strengthen the table’s foot. Before doing this, ensure that the table is upside down so that the foothold is on top. This method can speed the gluing process.
-When the table’s feet are strong enough to support the board, flip the table so the board is facing upward. Paint the table with the chalkboard paint using the roller for the surface and the paint brush for the edge. Spread the coat evenly and wait for the paint to dry.
-You can do the second painting with similar technique and let the paint dry again for smooth surface.
Reference: web.horde.to